Configure Brand Story Popup
The Brand Story Popup helps you engage shoppers by sharing your brand story before they receive a reward for subscribing. This step-by-step guide explains how to configure the pop-up.
Step 1. Set up your Earning Mechanism
The Earning Mechanism defines how shoppers earn their reward. The goal is to add other mechanisms in the future.
In this case, completing your Brand Story journey grants them a discount.
Under Reward Configuration, you can:
- Choose the discount percentage – This defines how much shoppers will get off their first purchase (e.g., 5%, 10%, 12%). You don’t need to create the discount code as each customer automatically receives a unique, non-stackable, single-use code that expires after 30 minutes to encourage quick action ⚡⌛
- Set the Reward label – This is the text that appears in the popup and the persistent tab (for example, “10% discount on first purchase” or “Get 12% OFF your first order”).
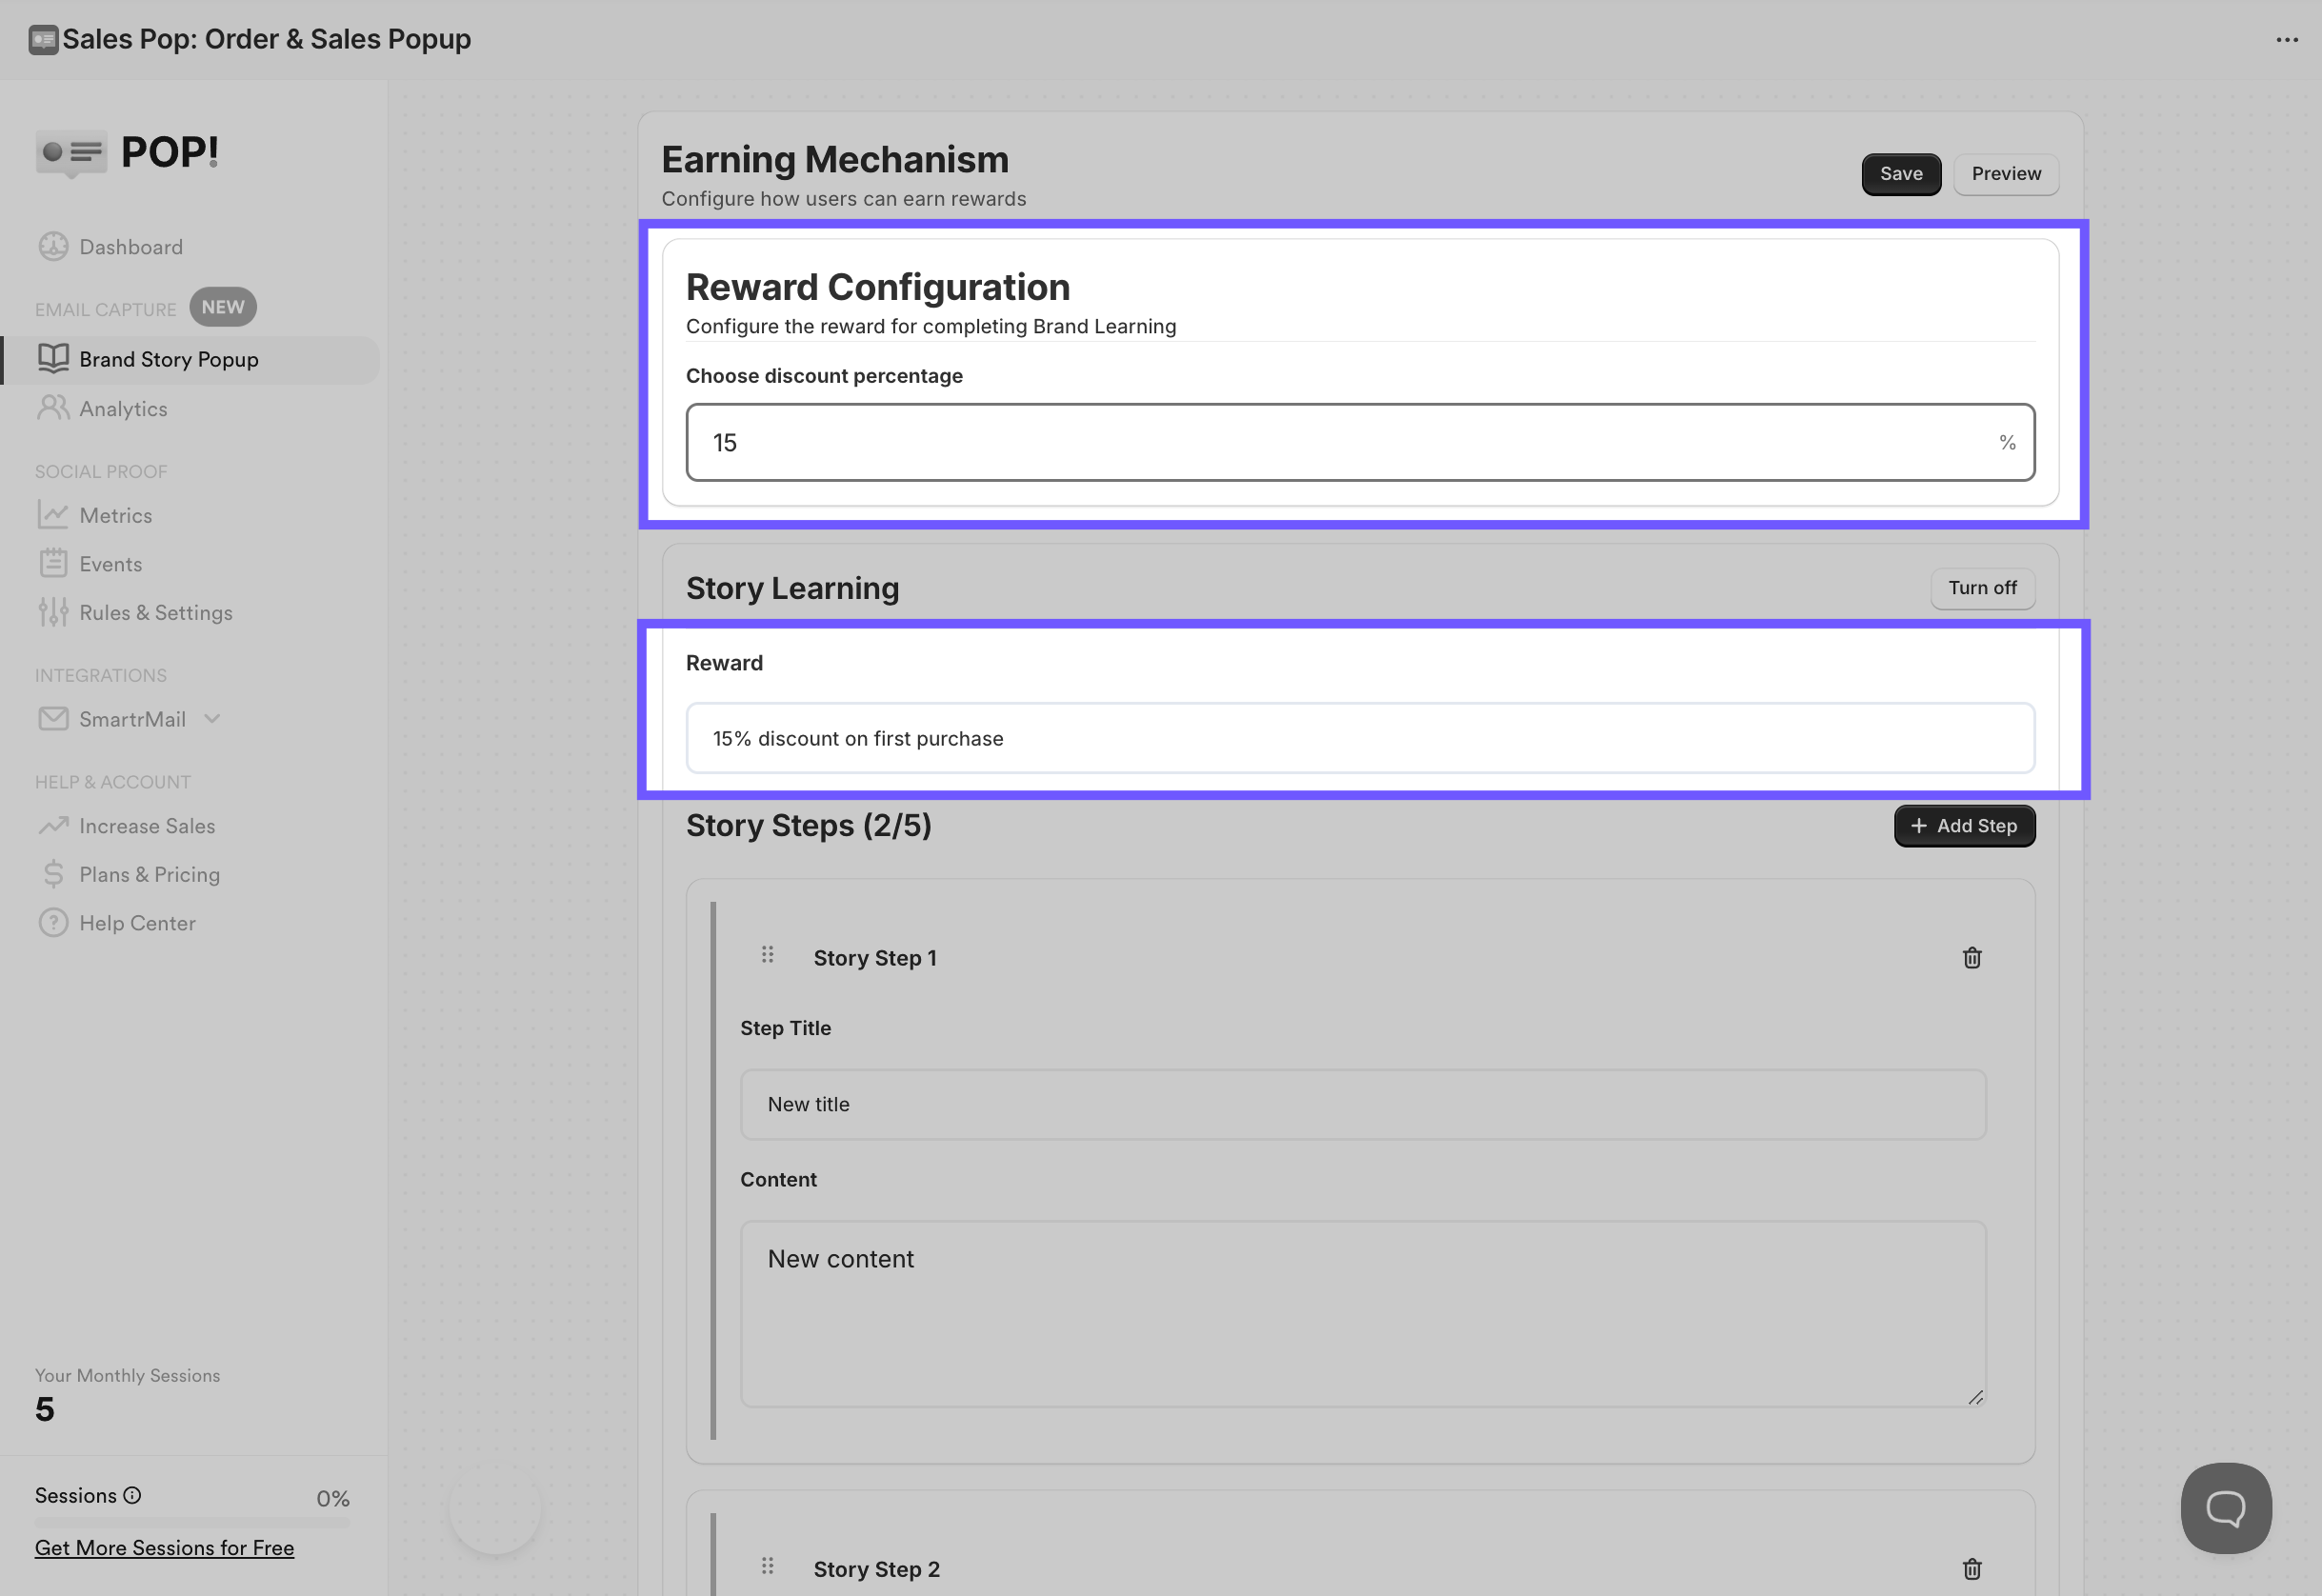
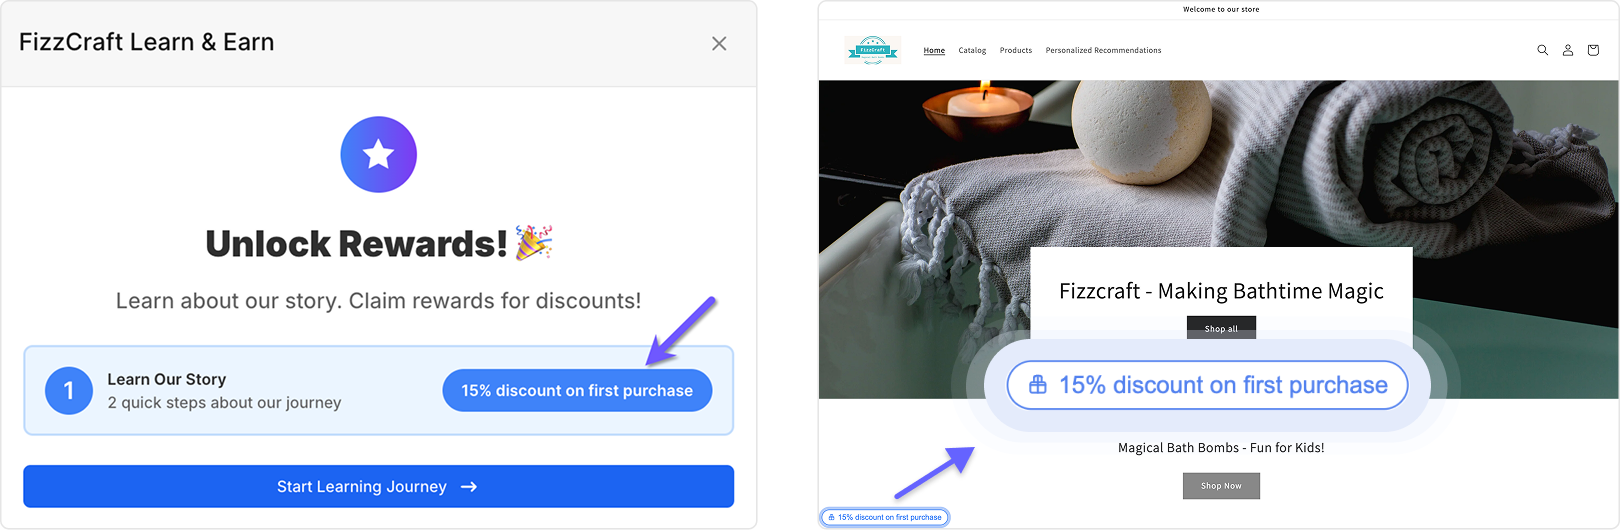
Note: In the initial slide, only the “Reward” text is customizable. It's also the text that appears in the persistent tab, which serves as the trigger for the popup.
Step 2. Tell your story
After enabling the Brand Story Popup, you can begin crafting your story.
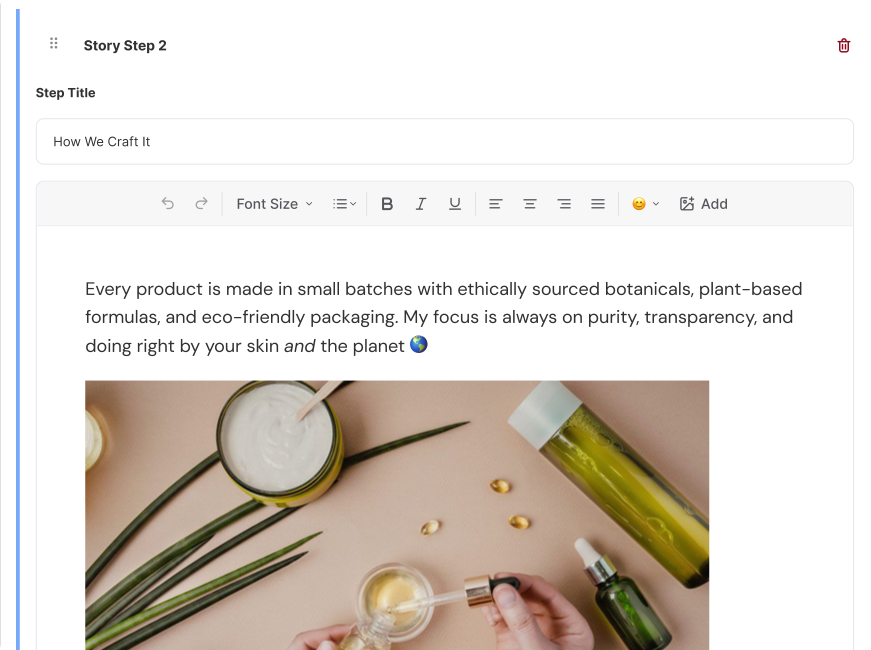
Tip: For best results, use images around 624 × 400px. Very tall or portrait-style images may appear cropped or create extra vertical space in the popup. Recommended aspect ratios are 4:3 or 16:10. All images are automatically optimized and will display at a maximum width of 624px, even if you upload a larger file.
Consider that there are always 3 fixed slides: intro, email input, and discount confirmation. These slides aren’t customizable (yet 😉) but are included in the total count.
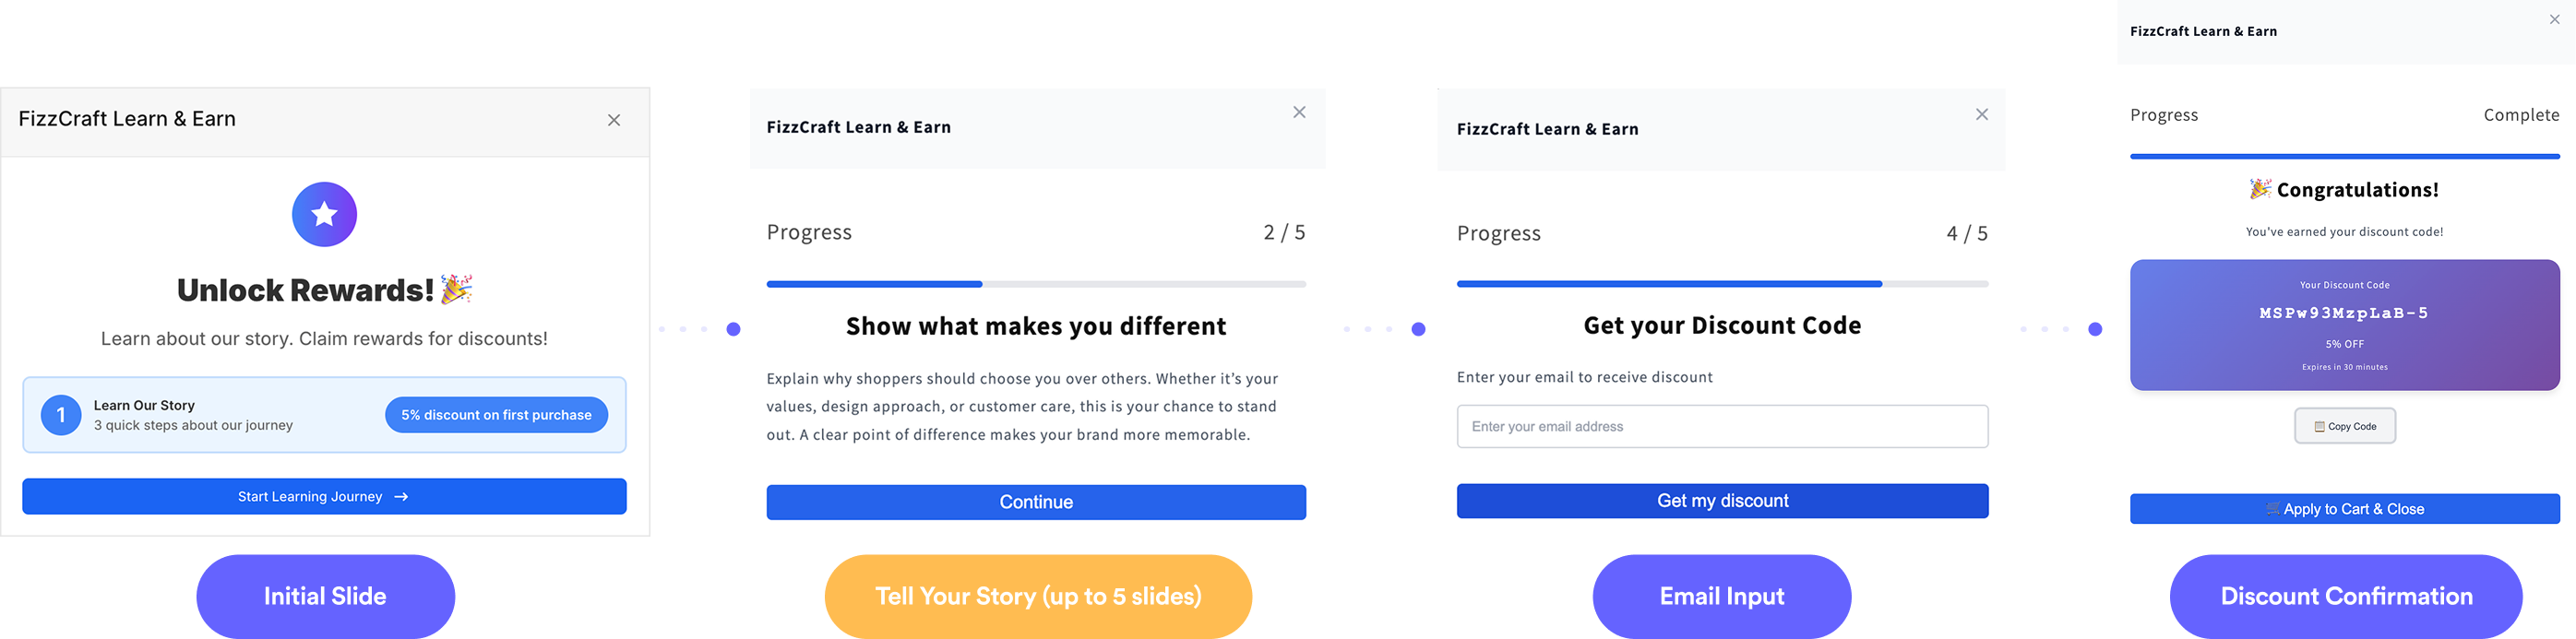
Click Preview to experience the full flow.
In this section, you can also:
- Click Add Step to include up to 5 story slides.
- Drag and drop slides to reorganize their order.
💡 We recommend adding 3 story slides for the best engagement and completion rate.
Step 3. Review and test
Once your story and reward are set:
- Click Preview to see how the complete flow will appear to shoppers.
- Use Turn off if you’d like to disable the pop-up at any time.
Step 4. Triggering the pop-up
After enabling your Brand Story Popup, head to your Shopify store to verify it.
You’ll find a persistent tab in the bottom left corner of your storefront, which serves as the trigger for the popup.
Current limitations
We know customization matters. This first version focuses on getting the core experience right, and we’ll continue to expand it so you can fully tailor the popup to fit your brand and goals. In the meantime, we’d love your feedback to help shape the next iterations.
Some customization options are not yet available but will be added soon:
- 🔘 Buttons: Buttons text and style can’t be customized at the moment.
- 🧩 Trigger options: The persistent tab is currently the only trigger mechanism for this popup.
- ⏱️ Trigger timing: Always appears after 5 seconds (this timing will be customizable soon).
- 📍 Placement: Only appears in the bottom left corner for now.
- 🎨 Styling: The popup automatically adopts your store’s default theme styling for a cohesive look. Full styling customization will be available in future updates.
Questions or feedback?
If you need help or would like to share your feedback about Brand Story Popup, please contact us! We'd love to hear from you at support@salespop.com